Harraag's Hideout: Difference between revisions
Jump to navigation
Jump to search
imported>Sanddh mNo edit summary |
imported>Arkalor's Bot m (template clean up) |
||
| (8 intermediate revisions by 3 users not shown) | |||
| Line 4: | Line 4: | ||
| Updated = | | Updated = | ||
| | | | ||
| Wiki Map File = | | Wiki Map File = 0060.png | ||
| ACmaps.com ID = | | ACmaps.com ID = | ||
| | | Coordinates = 60.2S 80.2W | ||
| | | Landblock = 0060 | ||
| | | Dereth Map = {{Map Point|60.2|S|80.2|W|Marker=Dungeon}} | ||
| Nearest Town = | | Nearest Town = Ayan Baqur | ||
| Nearest LS = | | Nearest LS = 59.0S 88.4W | ||
| Route = East of [[Ayan Baqur]]. | | Route = East of [[Ayan Baqur]]. | ||
| Level Restrictions = 120 | |||
| Level Restrictions = | | Tieable = | ||
| Tieable = | | Recallable = | ||
| Recallable = | | Summonable = | ||
| Summonable = | | Lifestone if Log = | ||
| Lifestone if Log = | | Quest Flag = Talk first to [[Guard Winterborn]], then talk to [[Chief Taraash]] (locked fellow) | ||
| Quest Flag = Talk first to [[Guard Winterborn]], | |||
| | | | ||
| Live Image = | | Live Image = Live.jpg | ||
| Live Image Caption = | | Live Image Caption = | ||
}} | }} | ||
== | == Notes == | ||
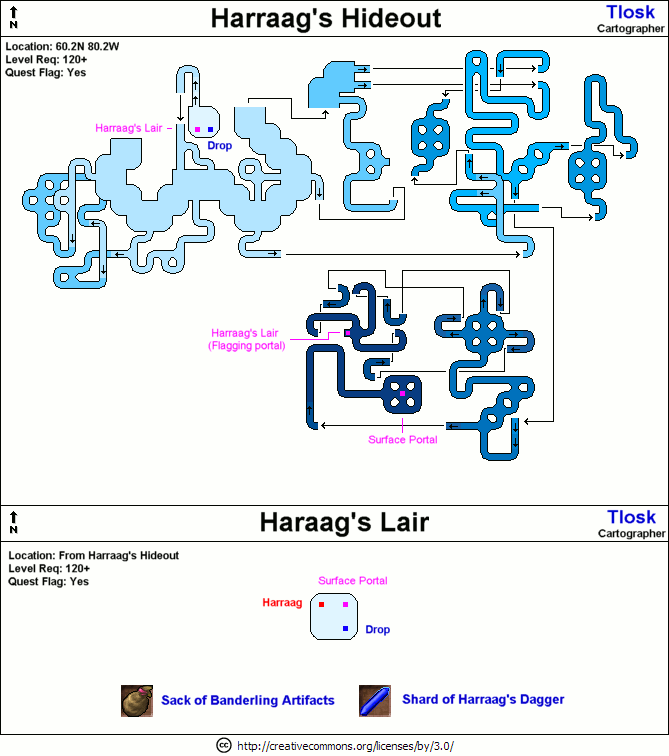
At the entrance, you will already see a portal to [[Harraag's Lair]]. However, you need to make your way to the bottom, and use the portal there first. | |||
== Map == | Note that although the dungeon is not a lifestone on log dungeon, if you log you will drop from fellow, and won't be able to get back inside dungeon without fellow. | ||
[[ | |||
== Maps == | |||
* Wiki Map: | |||
<div style="overflow:hidden">[[File:0060.png|200px]]</div> | |||
* Wiki Map with route highlighted: | |||
<div style="overflow:hidden">[[File:0060 Route.png|200px]]</div> | |||
== NPCs == | == NPCs == | ||
* | * None | ||
== Creatures == | == Creatures == | ||
{{Creature Class|Banderling | {{Creature Class|Banderling | ||
| Location = Dungeon | |||
| Banderling Aggressor | |||
| Banderling Champion | |||
| Banderling Paragon | |||
| Banderling Hierophant | |||
}} | |||
{{Creature Class|Carenzi | |||
| Location = Dungeon | |||
| Ravager | |||
}} | |||
{{Creature Class|Virindi | |||
| Location = Dungeon | |||
| Virindi Paradox | |||
| Schism | |||
| Umbral Rift | |||
}} | |||
== Items and Objects == | |||
* | * ?? | ||
== Portals == | |||
* [[ | * [[Harraag's Lair]] - General location, drop coords, restrictions. | ||
* | * Surface - see map | ||
== Images == | == Images == | ||
Click image for full size version. | Click image for full size version. | ||
<gallery heights=200px widths=200px perrow=4> | <gallery heights=200px widths=200px perrow=4> | ||
Image: | Image:Harraag's Hideout Live.jpg|Harraag's Hideout | ||
Image:Image.jpg|Caption | Image:Image.jpg|Caption | ||
</gallery> | </gallery> | ||
Latest revision as of 18:13, 7 December 2014
| Maps NPCs Creatures Items and Objects Portals Images Update History |
| Harraag's Hideout | |
|---|---|
| Quests | Aerbax's Prodigal Banderling |
| Restrictions | Level: 120 Quest Flagged Tieable: No Recallable: No Summonable: No |
| Coordinates | 60.2S 80.2W near Ayan Baqur |
| Nearest LS | 59.0S 88.4W |
| Route | East of Ayan Baqur. |
| Map Files: | Wiki Map |
Show location on Dereth map
| |
| 0060 | |


Notes
At the entrance, you will already see a portal to Harraag's Lair. However, you need to make your way to the bottom, and use the portal there first.
Note that although the dungeon is not a lifestone on log dungeon, if you log you will drop from fellow, and won't be able to get back inside dungeon without fellow.
Maps
- Wiki Map:

- Wiki Map with route highlighted:

NPCs
- None
Creatures
Items and Objects
- ??
Portals
- Harraag's Lair - General location, drop coords, restrictions.
- Surface - see map
Images
Click image for full size version.
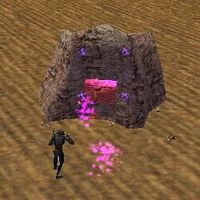
Harraag's Hideout

Caption

