Tenkarrdun Foundry: Difference between revisions
Jump to navigation
Jump to search
imported>Arkalor's Bot m (template clean up) |
imported>An Adventurer (dungeon contains runed chest, updating with location of runed chest and sturdy steel chest) |
||
| (One intermediate revision by one other user not shown) | |||
| Line 1: | Line 1: | ||
{{Dungeon Summary | {{Dungeon Summary | ||
| Related Quests = [[Lady Aerfalle Quest]] | | Related Quests = [[Lady Aerfalle Quest]] | ||
| Wiki Map File = | | Wiki Map File = | ||
| ACmaps.com ID = 0116 | | ACmaps.com ID = 0116 | ||
| Coordinates = 88.8N 42.8E | | Coordinates = 88.8N, 42.8E | ||
| Landblock = 0116 | | Landblock = 0116 | ||
| Dereth Map = {{Map Point|88.8|N|42.8|E|Marker=Dungeon}} | | Dereth Map = {{Map Point|88.8|N|42.8|E|Marker=Dungeon}} | ||
| Line 20: | Line 18: | ||
== Notes == | == Notes == | ||
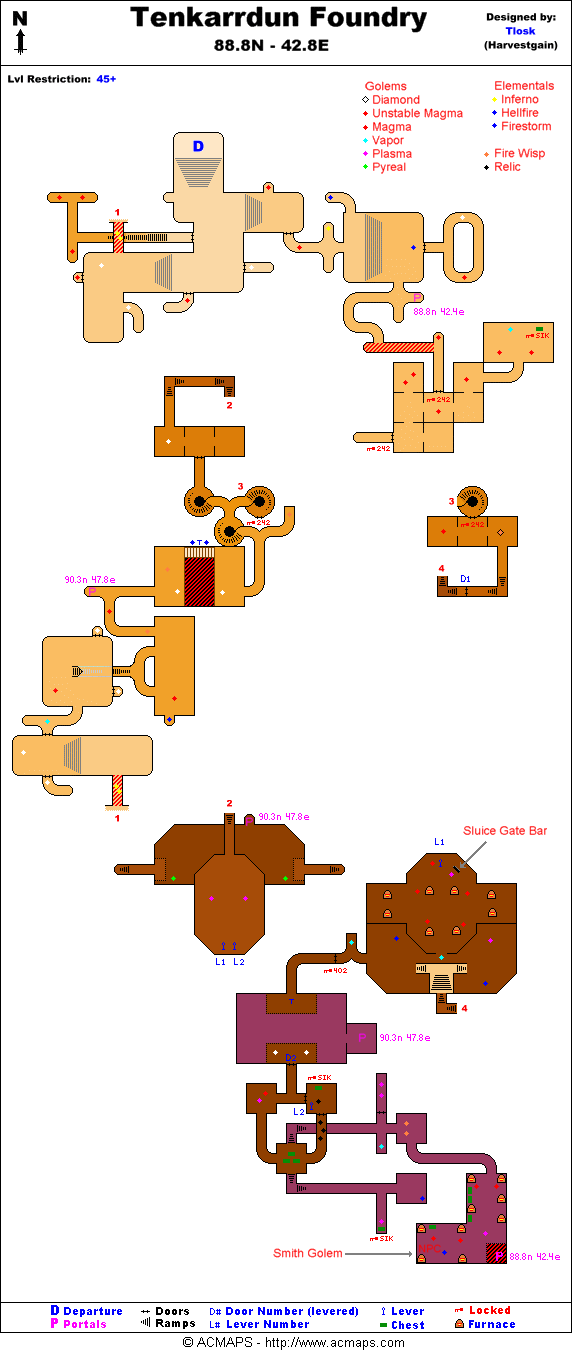
The [[Sluice Gate Bar]] is located half way down on the floor. The [[Smithing Golem]] only appears after the bar has been given to the [[Repair Golem]] at the bottom of [[Aerlinthe Reservoir]]. Lockpick is needed. The Smith Golem accepts the [[Pyreal Forge Bellows]] (after bar has been given). | The [[Sluice Gate Bar]] is located half way down on the floor. The [[Smithing Golem]] only appears after the bar has been given to the [[Repair Golem]] at the bottom of [[Aerlinthe Reservoir]]. Lockpick is needed. The Smith Golem accepts the [[Pyreal Forge Bellows]] (after bar has been given). | ||
There is a fixed location [[Sturdy Steel Chest]] near the end. | There is a fixed location [[Sturdy Steel Chest]] near the end. | ||
| Line 56: | Line 53: | ||
== Items and Objects == | == Items and Objects == | ||
* {{Itemlink|Sluice Gate Bar}} - half way down on the floor, see Map. | * {{Itemlink|Sluice Gate Bar}} - half way down on the floor, see Map. | ||
* {{Itemlink| | * {{Itemlink|Chest}}s - See Map. | ||
* {{Itemlink|Chest}} - | * {{Itemlink|Runed Chest}} (unlocked) - See map. On the map, it is labeled as a SIK chest. It is the one beyond door 2 (D2) in the room with lever 2 (L2) | ||
* {{Itemlink|Sturdy Steel Chest}} - near the end, see Map. On the map, it is labeled as a SIK chest. It is the one beyond the room with 3 chests. | |||
== Portals == | == Portals == | ||
| Line 65: | Line 63: | ||
Click image for full size version. | Click image for full size version. | ||
<gallery heights=200px widths=200px perrow=3> | <gallery heights=200px widths=200px perrow=3> | ||
File:Tenkarrdun Foundry | File:Tenkarrdun Foundry Live.jpg|Tenkarrdun Foundry Entrance | ||
File:Smithing Golem Live.jpg|Smithing Golem | File:Smithing Golem Live.jpg|Smithing Golem | ||
</gallery> | </gallery> | ||
== Update History == | |||
{{Update History| | |||
[[To Raise a Banner of Flame]] | |||
* Dungeon added. | |||
}} | |||
Latest revision as of 06:57, 8 May 2022
| Maps NPCs Creatures Items and Objects Portals Images Update History |
| Tenkarrdun Foundry | |
|---|---|
| Quests | Lady Aerfalle Quest |
| Restrictions | Level: 40 Tieable: No Recallable: No Summonable: No |
| Coordinates | 88.8N, 42.8E |
| Nearest LS | ?? |
| Route | From Aerlinthe drop, follow the inner harbor shoreline, in the northwest corner of the harbor go up the mountain to the west. The path wraps around the mountain to the north. |
| Map Files: | ACMaps Map |
Show location on Dereth map
| |
| 0116 | |


Notes
The Sluice Gate Bar is located half way down on the floor. The Smithing Golem only appears after the bar has been given to the Repair Golem at the bottom of Aerlinthe Reservoir. Lockpick is needed. The Smith Golem accepts the Pyreal Forge Bellows (after bar has been given).
There is a fixed location Sturdy Steel Chest near the end.
Maps
- Map (from ACMaps.com)
- Wiki Map:
NPCs
Creatures
Items and Objects
- Sluice Gate Bar - half way down on the floor, see Map.
- Chests - See Map.
- Runed Chest (unlocked) - See map. On the map, it is labeled as a SIK chest. It is the one beyond door 2 (D2) in the room with lever 2 (L2)
- Sturdy Steel Chest - near the end, see Map. On the map, it is labeled as a SIK chest. It is the one beyond the room with 3 chests.
Portals
- Surface - different locations with different exit points, see map.
Images
Click image for full size version.
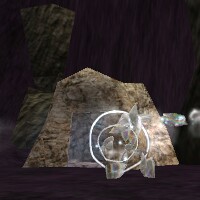
Tenkarrdun Foundry Entrance
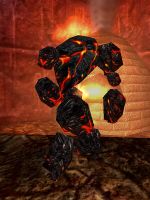
Smithing Golem


Update History
|