Fiery Weapons: Difference between revisions
Jump to navigation
Jump to search
imported>Tiger1986 No edit summary |
imported>Tiger1986 No edit summary |
||
| Line 37: | Line 37: | ||
# Continue east through the intersection and head down another ramp. From here, you can just keep left all the way down to the Banderling room. | # Continue east through the intersection and head down another ramp. From here, you can just keep left all the way down to the Banderling room. | ||
# You will go through a door and then a few rooms filled with Banderlings. When you head through the door to your east, you'll be at a split. Keep left and go through the winding corridor until you reach the ramp down. | # You will go through a door and then a few rooms filled with Banderlings. When you head through the door to your east, you'll be at a split. Keep left and go through the winding corridor until you reach the ramp down. | ||
# Keep to the left until you come to a locked door (diff. 40). Pick it open, then continue left until you reach a large room with Banderlings and a | # Keep to the left until you come to a locked door (diff. 40). Pick it open, then continue left until you reach a large room with Banderlings and a Lich. | ||
# Another locked door is on the west wall (diff. 122). Pick it open, in the middle of this room is an area with [[Banderling Bandit]]s and a [[Banderling Striker]] near two chests. | # Another locked door is on the west wall (diff. 122). Pick it open, in the middle of this room is an area with [[Banderling Bandit]]s and a [[Banderling Striker]] near two chests. | ||
# Kill the [[Banderling Bandit]]s and loot the [[Quarter Staff of Fire]]. | # Kill the [[Banderling Bandit]]s and loot the [[Quarter Staff of Fire]]. | ||
| Line 77: | Line 77: | ||
Click image for full size version. | Click image for full size version. | ||
<gallery widths=200px heights=200px perrow=3> | <gallery widths=200px heights=200px perrow=3> | ||
File:Fiery Weapons Live.jpg| | File:Fiery Weapons Live.jpg|Arwic Mine camp | ||
File:Fiery Weapons Live 2.jpg| | File:Fiery Weapons Live 2.jpg|Edelbar camp | ||
File:Fiery Weapons Live 3.jpg| | File:Fiery Weapons Live 3.jpg|Northwest camp | ||
</gallery> | </gallery> | ||
| Line 85: | Line 85: | ||
* The three Banderling Camps were updated during [[The Hall of the Tusker King]]. Originally a Banderling Bandit would spawn at each of the three camps which would drop either the [[Quarter Staff of Fire]], the [[Fire Spear]], or [[Fire Arrows]]. | * The three Banderling Camps were updated during [[The Hall of the Tusker King]]. Originally a Banderling Bandit would spawn at each of the three camps which would drop either the [[Quarter Staff of Fire]], the [[Fire Spear]], or [[Fire Arrows]]. | ||
* The first two camps were updated with higher level [[Banderling Bandit]]s which now drop the [[Quarter Staff of Fire]] only. | * The first two camps were updated with higher level [[Banderling Bandit]]s which now drop the [[Quarter Staff of Fire]] only. | ||
* The third and the most difficult camp is now inhabited by higher level Banderling | * The third and the most difficult camp is now inhabited by higher level Banderling including a [[Banderling Rogue]] which drops the [[Fire Spear]]. | ||
* Updated during the [[Reforging the Past]] event, the Edelbar camp can now be accessed and completed through the [[Facility Hub Quests]] for an experience reward. The Quarter Staff of Fire has also received an update. | * Updated during the [[Reforging the Past]] event, the Edelbar camp can now be accessed and completed through the [[Facility Hub Quests]] for an experience reward. The Quarter Staff of Fire has also received an update. | ||
Revision as of 14:48, 24 January 2010
| Walkthrough & Notes Dungeons & Maps Rewards Images Dialog Update History |
| Fiery Weapons | |
|---|---|
| Level: | ?? |
| Type: | Solo/Group |
| Starts At: | ?? |
| Repeat: | ?? |
Quest Overview
Recover fiery weapons from Banderlings camped in the northern parts of Dereth.
Walkthrough
Quarter Staff of Fire
Arwic Mines
A minimum lockpick skill of 122 is required to reach the area with the staff.
- Optional: Purchase the Arwic Mines Rumor from Wylreda the Scribe in Rithwic.
- From Arwic run to the Arwic Mines portal at 33.8N, 56.8E.
- From the drop go through the door and take the first right into the room with the NPC vendor Elthina the Shady.
- From this room, take the passage on the north wall and head down the ramp.
- Continue east through the intersection and head down another ramp. From here, you can just keep left all the way down to the Banderling room.
- You will go through a door and then a few rooms filled with Banderlings. When you head through the door to your east, you'll be at a split. Keep left and go through the winding corridor until you reach the ramp down.
- Keep to the left until you come to a locked door (diff. 40). Pick it open, then continue left until you reach a large room with Banderlings and a Lich.
- Another locked door is on the west wall (diff. 122). Pick it open, in the middle of this room is an area with Banderling Bandits and a Banderling Striker near two chests.
- Kill the Banderling Bandits and loot the Quarter Staff of Fire.
Edelbar
- Optional: Barkeeper Wilomine in Holtburg sells Edelbar Directions. This rumor tells of another Banderling Camp outside of Holtburg.
- Run west from Holtburg to the Banderling Camp near Edelbar at 43.9N, 25.1E.
- Kill the Banderlings and search them until you find the Quarter Staff of Fire.
Fire Spear
Northwest Banderling Camp
- Head to the Banderling Camp at 65.0N, 3.0W.
- Route: take the Lake Nemuel Settlement portal from Stonehold (69.6N, 20.2W) to be dropped just a few clicks from the camp at 62.8N, 0.1W.
- Once you reach the camp, you will be met by many Banderlings including Banderling Thrashers, Banderling Enforcers and a Banderling Rogue camped near a Sturdy Iron Chest.
- Kill the Banderling Rogue and loot the Fire Spear.
Maps
| Dungeon | Coordinates | Wiki Map | ACmaps |
|---|---|---|---|
| Arwic Mines | 33.8N, 56.8E | -- | 01EF |
Items
Quest Items
![]() Arwic Mines Rumor
Arwic Mines Rumor![]() Edelbar Directions
Edelbar Directions
Rewards
![]() Fire Spear
Fire Spear![]() Quarter Staff of Fire
Quarter Staff of Fire
Images
Click image for full size version.
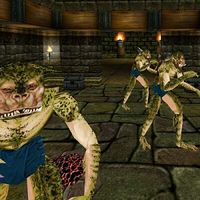
Arwic Mine camp
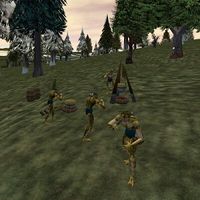
Edelbar camp
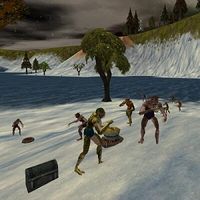
Northwest camp


Notes
- The three Banderling Camps were updated during The Hall of the Tusker King. Originally a Banderling Bandit would spawn at each of the three camps which would drop either the Quarter Staff of Fire, the Fire Spear, or Fire Arrows.
- The first two camps were updated with higher level Banderling Bandits which now drop the Quarter Staff of Fire only.
- The third and the most difficult camp is now inhabited by higher level Banderling including a Banderling Rogue which drops the Fire Spear.
- Updated during the Reforging the Past event, the Edelbar camp can now be accessed and completed through the Facility Hub Quests for an experience reward. The Quarter Staff of Fire has also received an update.